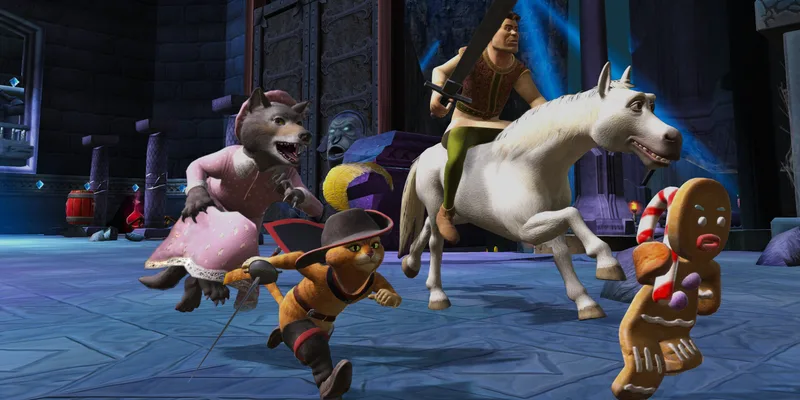
- DreamWorks Shrek 2 Remastered swamp mission: Follow the lily-pad route and clear each collectible branch.
- Main objective: Restore the route, recover the carriage wheel, and survive the forest ambush.
- Best character focus: Shrek handles heavy obstacles while Donkey reaches alternate paths.
- Collectible priority: Gather coins, Hero Bars, wanted posters, and Four-Leaf Clovers before leaving.
- Key warning: Water slows movement, while explosive pumpkins and hostile plants punish careless timing.
DreamWorks Shrek 2 Remastered swamp mission route
The swamp route is built around short platforming challenges, collectible detours, and staged combat encounters. The safest approach is to move methodically instead of rushing toward the next story marker. Water reduces your pace, so use lily pads whenever they form a visible chain across a pool.
The mission also teaches several mechanics that remain useful later: automatic ledge climbing, vine movement, double jumps, breakable crates, lever activation, and character-specific traversal. Shrek is the primary problem solver, but Donkey and Puss in Boots can reveal routes that are not obvious from the main path.
| Route element | What to do | Main reward or benefit |
|---|---|---|
| Swamp water | Jump across lily pads instead of walking through the water | Faster movement and safer positioning |
| Raised ledges | Run directly toward reachable edges | Automatic climbing |
| Hanging vines | Jump onto the vine and use directional controls | Access to alternate platforms |
| Damaged bridge | Use a double jump to cross the gap | Progress toward the forest path |
| Wooden crates | Break every crate near the route | Coins, Hero Bars, and hidden items |
| Levers | Stand close and use the interaction attack | Opens bridges or lowers barriers |
Video Highlights:
- The route emphasizes lily-pad movement over slow water traversal.
- Shrek can break crates, remove posters, and clear wooden barriers.
- Double jumps and vines connect the major swamp platforms.
- Collectibles often sit beside the main route rather than directly on it.
Keep moving forward before jumping to a lily pad. A running jump gives better distance and reduces the chance of landing in the water.
Shrek
- Breaks crates and wooden boards
- Pulls levers and clears heavy obstacles
- Best choice for direct combat
Donkey
- Reaches narrow or unusual routes
- Uses jump attacks against exposed enemies
- Helpful during character-specific encounters
Puss in Boots
- Handles small spaces and elevated paths
- Excels at agile movement
- Useful for precision platforming
The first pass should prioritize route recognition. Notice where the mission places Hero Bars, floating coins, and collectible markers. Some items are visible from the main path but require returning after a lever or bridge has been activated.
Step-by-step swamp mission walkthrough
Clear the opening route
Start by removing the visible wanted poster and collecting nearby coins. Break crates along the edges of the path, then use the lily pads to cross the water. Avoid spending time walking through the swamp because the slower movement makes incoming attacks harder to avoid.
Use the vine and reach the bridge
Approach the raised ledge and jump onto the hanging vine. Move horizontally along it until the next safe platform is aligned beneath you. Drop only when the landing area is clear, then use a double jump to cross the damaged bridge.
Activate the lever
Search the platform beyond the bridge for the lever. Stand directly in front of it and use the interaction attack. The lever changes the route, allowing access to a previously blocked area and creating a safer return path.
Collect the Four-Leaf Clover
Look for breakable boards near the newly opened route. Smash them to reach the Four-Leaf Clover. These items increase health capacity, making them more valuable than ordinary coins when the mission introduces repeated ambushes.
Prepare for the carriage ambush
Return to the carriage route and expect bandits to appear. Use repeated punches and short combos rather than standing still. After the enemies are defeated, recover the wheel, clear the fallen logs, and continue toward the forest.
The mission’s combat tutorial is intentionally straightforward. A single punch works against isolated enemies, while a two-hit or three-hit combo is better when several bandits approach together. Keep Shrek moving between attacks so enemies cannot surround him.
| Encounter | Recommended response | Mistake to avoid |
|---|---|---|
| Single bandit | Use a short punch string, then reposition | Holding position after the attack |
| Two or more bandits | Use a two-hit or three-hit combo | Chasing one enemy into the group |
| Fallen logs | Attack the obstacle with Shrek | Searching for a hidden switch |
| Explosive pumpkin | Pick it up, aim, and throw before detonation | Carrying it near Shrek |
| Hostile plant | Attack after its motion finishes | Striking during its active hitbox |
| Ambush near the carriage | Clear enemies before collecting side items | Running past enemies and losing the route |
Explosive pumpkins are useful projectiles, but they are also hazards. Throw them as soon as the target is lined up instead of carrying them through a crowded area.
If a jump fails, do not immediately repeat it from the same angle. Reset your position, build running momentum, and aim for the center of the next lily pad or platform. Most missed jumps result from approaching without enough forward movement.
Collectibles, upgrades, and hidden paths
The swamp mission rewards exploration more than speed. Coins are scattered in open spaces, above platforms, inside crates, and along alternate ledges. Hero Bars restore health or provide a temporary boost, while Four-Leaf Clovers expand Shrek’s maximum health capacity.
Wanted posters are especially important because they are placed away from the most obvious route. The opening poster is easy to spot, but later posters may require detours through the forest or around raised terrain. Treat every poster as a search objective rather than an item to collect while sprinting past.
| Collectible | Typical location | Collection advice |
|---|---|---|
| Coins | Open paths, crates, ledges, and water crossings | Sweep the edges before advancing |
| Hero Bars | Suspended platforms and combat routes | Collect them when health is low |
| Four-Leaf Clovers | Hidden behind boards or off-route platforms | Search after activating nearby levers |
| Wanted Posters | Main areas and forest detours | Inspect corners and dead-end paths |
| Bonus-level access | Rewarded after meeting collection conditions | Revisit missed branches before leaving |
Coins
Collect them during the first pass. Their floating placement often signals a nearby platform or hidden route.
Hero Bars
Save nearby health boosts for the next combat encounter when possible.
Four-Leaf Clovers
Prioritize these over ordinary coins because they improve long-term survivability.
Wanted Posters
Search behind obstacles and along alternate paths before triggering the next story scene.
A reliable collection pattern is to complete the main route first, identify every blocked branch, and then backtrack after using the required lever. This prevents repeated failed jumps and helps separate combat areas from platforming areas.
| Search zone | First question to ask | Likely action |
|---|---|---|
| Around the carriage | Is there a crate or poster behind the vehicle? | Circle the carriage before leaving |
| Near lily pads | Does the coin trail continue beyond the visible pad? | Follow the full chain |
| Beside a lever | Did the lever open a nearby barrier? | Return to the earlier blocked branch |
| Around damaged boards | Can Shrek break the obstruction? | Attack the boards and inspect the space |
| Forest detour | Is a collectible visible beyond the enemy route? | Clear enemies, then explore safely |
Collect Four-Leaf Clovers and wanted posters before advancing through a major transition. Returning later may be possible, but it is easier to finish each branch while the route is familiar.
Do not confuse a visible collectible with an immediately reachable one. The mission frequently uses height, vines, levers, or breakable objects to delay access. If an item appears just beyond a jump, search the surrounding area for the intended setup instead of forcing the jump.
Combat and hazard management
Combat becomes more demanding when the swamp route moves into the forest. Enemies appear around narrow paths, explosive objects, and environmental hazards. The best defense is spacing: attack once or twice, step away, then return when the enemy’s animation ends.
Shrek’s strongest advantage is his ability to remove obstacles and control space with close-range attacks. Donkey can support the route with jump attacks, while Puss in Boots is better suited to agile encounters and tight passages. Change characters when the mission clearly provides a character-specific route.
| Threat | Danger | Safer tactic |
|---|---|---|
| Bandits | Surrounding attacks and repeated hits | Keep moving and use short combos |
| Explosive pumpkins | Delayed blast damage | Throw immediately after aiming |
| Hostile plants | Sudden close-range strikes | Wait for the attack cycle to finish |
| Bear traps | Damage on narrow paths | Walk carefully and identify safe gaps |
| Spiders and bats | Fast movement and awkward angles | Attack after they commit to a pass |
| Forest ambushes | Multiple threats at once | Clear the nearest enemy before exploring |
The forest can also contain food or other visual distractions. Some objects are useful, while others exist to draw attention away from traps. Inspect the ground before jumping across a narrow gap, particularly when the camera angle hides the landing area.
Avoid attacking environmental hazards just because they move. Wait for a safe opening, especially around plants, traps, and enemies positioned beside water.
When health is low, do not rush toward a collectible simply because it is visible. Clear the nearby threat first, then collect the Hero Bar or continue through the route. Taking damage while interacting with an object can turn a manageable encounter into a restart.
Swamp mission checklist and progression
Use the following checklist before leaving the swamp and carriage route. It focuses on objectives that are easy to overlook during a fast story clear.
Essential Swamp Mission Checklist:
- Remove the opening wanted poster
- Collect visible coins from the swamp and carriage route
- Use lily pads to cross the water efficiently
- Activate the lever and inspect the newly opened branch
- Find the Four-Leaf Clover behind the breakable boards
- Defeat the carriage ambush and recover the wheel
- Clear the fallen logs before continuing toward the forest
| Progress checkpoint | Confirm before moving on |
|---|---|
| Opening swamp | Poster removed, crates broken, nearby coins collected |
| Lily-pad crossing | Water route completed without skipping the side platform |
| Lever area | Lever activated and the return branch inspected |
| Clover branch | Boards destroyed and health upgrade collected |
| Carriage encounter | Bandits defeated and wheel recovered |
| Forest entrance | Fallen logs cleared and remaining items checked |
The ideal completion order is route access first, collectibles second, combat cleanup third. This order avoids wasting health while searching and reduces the chance of overlooking a branch that becomes accessible only after a lever is pulled.
When the next story objective becomes visible, pause and scan behind the camera, beside crates, and above the nearest ledge. The mission often places optional rewards just outside the forward view.
If you are only aiming to finish the story, focus on the lever, carriage wheel, bandits, and fallen logs. If you are pursuing stronger health capacity and bonus content, add the Four-Leaf Clover, wanted posters, and every reachable coin route to your objectives.
DreamWorks Shrek 2 Remastered swamp mission FAQ
Q: What is the safest way to cross the swamp?
Use the lily pads whenever possible. Walking through the water slows movement and makes it harder to respond to enemies or line up the next jump.
Q: How do I reach the Four-Leaf Clover?
Activate the nearby lever, then search for breakable boards around the opened route. Smash the boards with Shrek and follow the newly revealed path.
Q: What should I collect before leaving the swamp mission?
Prioritize the wanted posters, Four-Leaf Clover, Hero Bars, and coins near the main route. Check crates and side platforms before triggering the next transition.
Q: How do I handle the carriage ambush?
Use short punch combos, keep moving between attacks, and defeat the bandits before returning for optional collectibles. Afterward, recover the wheel and break the fallen logs.
The most reliable clear combines careful platforming with controlled exploration. Follow the lily pads, activate every visible lever, and finish nearby collectible branches before advancing the story.
The swamp mission is less about raw combat power and more about reading the environment. Once you recognize the relationship between lily pads, levers, vines, breakable boards, and collectible trails, the route becomes much easier to complete without unnecessary damage or backtracking.